NEW TUTORIAL!
NEW TUTORIAL!
Stencil Girl Products and MercArt
Visit Stencil Girl Products Blog stencilgirltalk.com and see my tutorial using two of the new designs from Stencil Girl Products: Tribal Hand and Segments.
Follow some simple steps to make easy metal embossing projects using Colored Aluminum, stencils and the new Gilder’s Paste patinas.
You will have a beautiful project in just a few minutes.
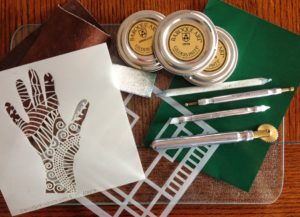
Products used on the tutorial:
Stencil Girl Products: Tribal Hand S180
Stencil Girl Products: Segments S189
MercArt’s Basic Metal Embossing Kit with 4 tools
MercArt’s green colored aluminum
MercArt’s Big Wheel, paper stump, suede, Fiber Glass tool and Filling Paste
Sanding Block
Gilder’s Paste colors: African Bronze, German Silver, Verdigris and Copper.

See the complete and easy to follow steps here too:
Steps:
Step 1)
1) Place the aluminum (color side down) over the Tribal Hand S180 stencil and rub against it with the Paper Stump until you clearly see the design.
Step 2)
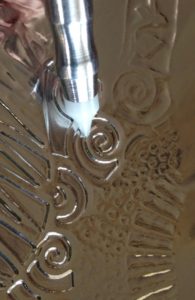
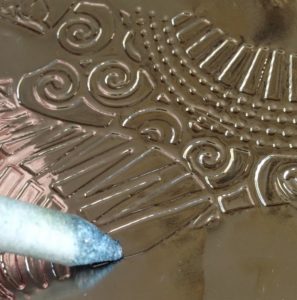
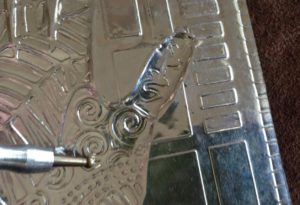
2)With the Teflon Tool D-01, outline every part of the stencil design to get a crisp definition.
Step 3)
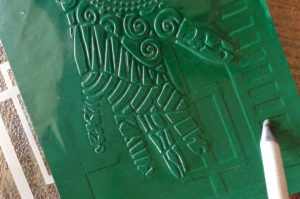
3)Place the metal color side up over the background stencil, Segments S189, and rub with the paper stump until you can see the design clearly. Outline the design with Teflon D-01.
Step 4)
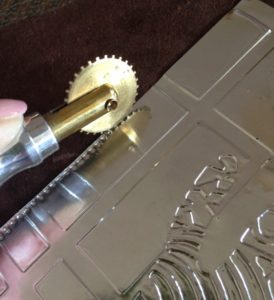
4)Place the metal on the back and over the suede and roll the Big Wheel (or any of MercArt’s Decorative Wheels) on the edge of the aluminum to create a border.
Step 5)
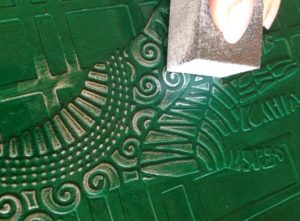
5)Remove the color of the embossed areas with a sanding block.
Step 6)
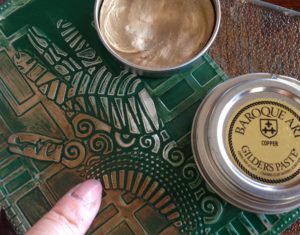
6)With your finger add any Gilder’s Paste colors you choose (we have 12 new colors to choose from!). They can be applied on layers to create new tones and interesting patinas.
Step 7)
7)Add dimension and make the metal “puff” by placing the metal on the back over the suede and embossing certain areas with the round sphere of the Cup and Ball #4 and the paper stump.
Step 8)
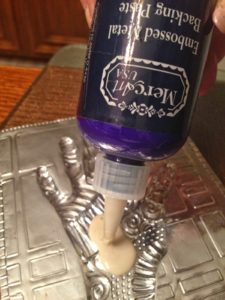
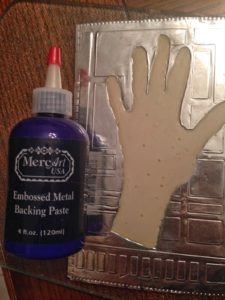
8)Fill the back of the embossed or raised areas of your project with MercArt’s Filling Paste. As it’s liquid, it levels itself and once it dries, it gets really hard, so the shapes remain embossed.
I hope this has inspired you to use stencils and color aluminum in a new way!
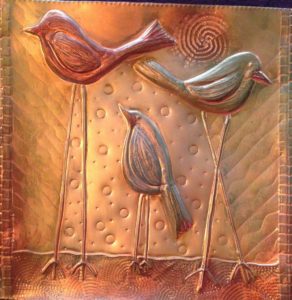
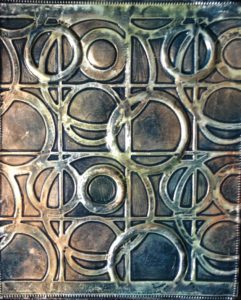
Other projects using Stencil Girl Products Stencils with MercArt color aluminum and Gilder’s Paste: